How to Use Cooler Bags: Ultimate Guide & Quick Chart
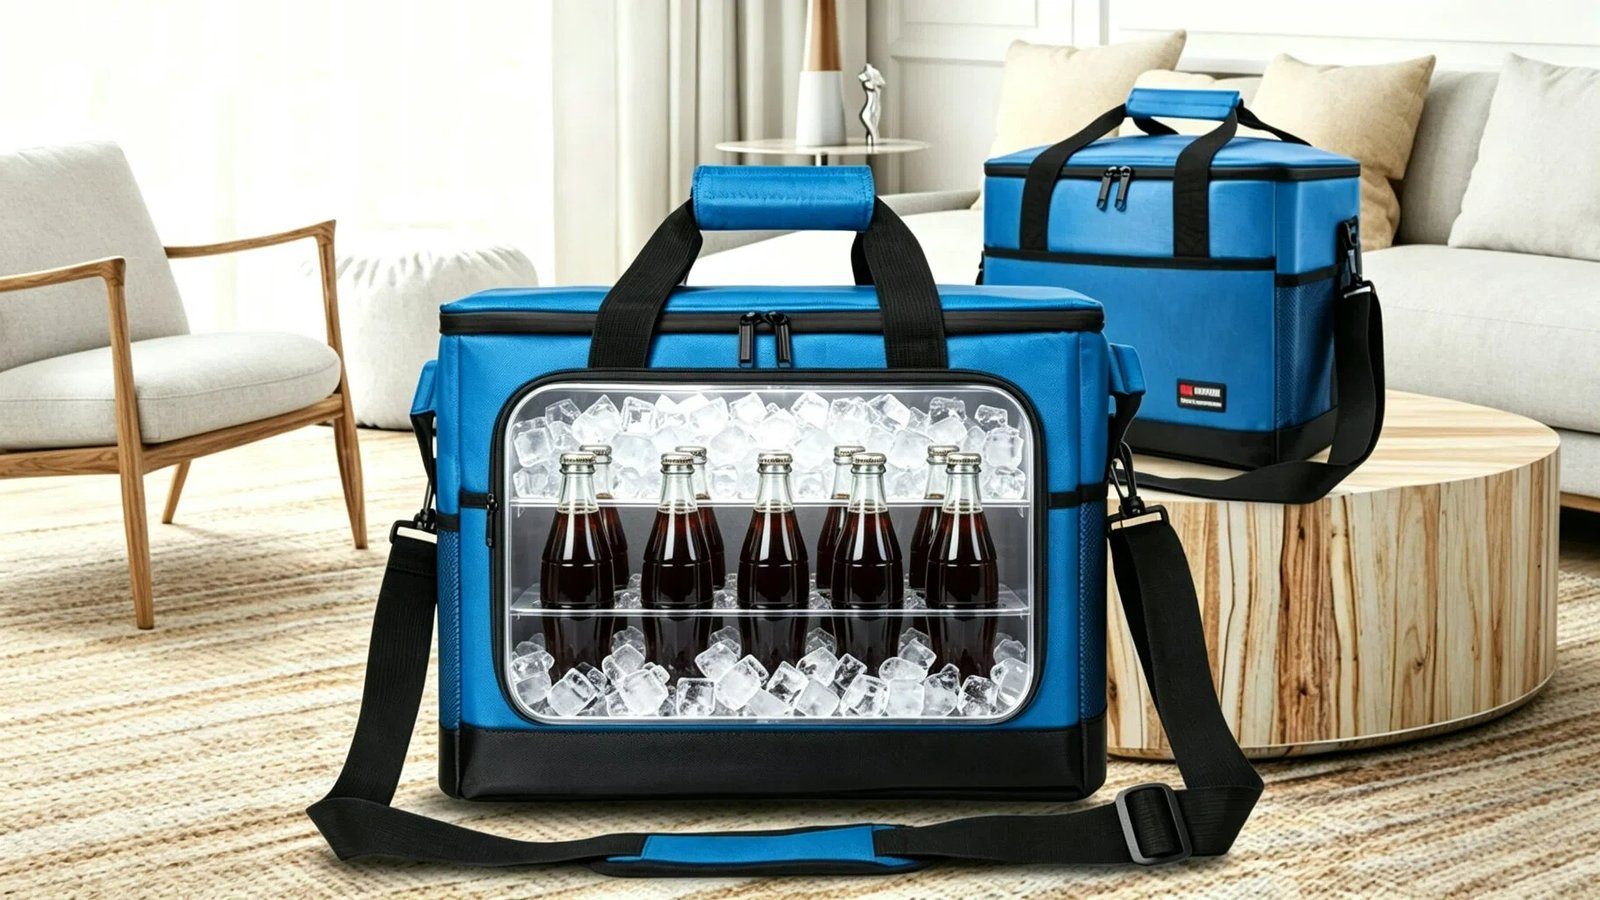
According to the U.S. Department of Agriculture’s official definition, the “danger zone” for food is between 4°C/40°F and 60°C/140°F (bacteria multiply approximately every 20 minutes within this temperature range). That sounds scary, doesn’t it? While using cooler bags can help keep food carried on the go out of the danger zone, do you tell your customers how to use them when you complete a transaction? If not, improper use can still expose food to the “danger zone,” and in severe cases, even lead to food poisoning! This would result in catastrophic complaints for any brand, but the solution is simple: teach your clients how to use cooler bags. In this article, I’ll teach you professional-level methods for using cooler bags to prevent any complaints from arising.
(Once you know how to use cooler bags, you’ll not only reduce customer complaints caused by users not knowing how to use them, but you’ll also be able to offer professional solutions when customers ask questions or seek recommendations—which will boost your conversion rate, right?)
Quick Takeaway: Choose the Right Cooler Bags Based on Your Project Needs
Before using cooler bags, it’s more important to choose the right type of cooler bag based on your project requirements or your customers’ usage scenarios—only then should you consider how to use them. I understand that you’re pressed for time and that your project clients are looking to you for answers, so I’ve put together a table recommending cooler bag types based on usage scenarios:
| Usage Scenario | Core Requirements | Cooler Bag Type |
| Picnics, short‑day trips for packed meals | Food‑safe lining, leak‑proof & easy‑to‑clean | food cooler bag |
| Parties, music festivals for beer & beverages | Fits drink containers, vibration‑resistant, customizable appearance | beer cooler bag |
| Road trips, multi‑purpose storage for short journeys | Large‑capacity, foldable, highly versatile | travel cooler bag |
| Outdoor breast‑milk storage & transport | Food‑grade safety, stable temperature control, odor‑isolation | breast milk cooler bag |
| Saltwater fishing for catch storage | Blood‑ and seawater‑resistant, rinse‑able, abrasion‑resistant | fish cooler bag |
| Themed‑party retail promotional gifts | Built‑in speakers, combines cooling and entertainment features | cooler bag with speakers |
Compared to a long-winded explanation, this article will help you get answers quickly, right? After you’ve made product recommendations to your clients, they might ask, “Why are you recommending this one? How do you use it?” So don’t rush to click away—the rest of this article will teach you the features and specific uses of various cooler bags, so you can answer your clients’ questions anytime and boost your sales.
Choose the type of cooler bag that best suits your project’s needs
Cooler bags do not provide refrigeration on their own (except for the electric versions); their primary function is to slow down heat transfer through a multi-layered structure. When designing cooler bags, adjustments are made to the compartments, thickness, and structure to better suit specific applications. I’ve listed several categories of cooler bags and explained their features to help you choose the one best suited for your project’s needs:
food cooler bag
Designed for carrying food while keeping it chilled, this product emphasizes a leak-proof construction. Seams are sealed to prevent sauces and broths from seeping into the insulation layer and causing damage.
R-value: 2.0–2.8
Chill retention time: 6–12 hours (at 25°C, with ice packs)
Ideal for: Commuting lunches, family picnics, and takeout meals
Portability: Excellent; folds for compact storage
Note: When selecting a product, carefully verify that the inner lining strictly complies with food contact standards EU 10/2011 (EU Regulation on Plastics in Contact with Food) and FDA 21 CFR (U.S. Food and Drug Administration). If these standards are not met, the product must not be used to store food.
Whole Foods Market, a fresh food retail brand, launched an in-store loyalty campaign, offering food cooler bags as gifts for purchases over a certain amount. Thanks to their leak-proof lining and lightweight design, these bags can be reused in various scenarios—such as carrying meals during daily commutes or for short picnics—effectively boosting brand exposure.
beer cooler bag
The focus is on optimizing the interior space and adding simple dividers to reduce the impact of bottles and cans colliding due to jolts during transport (glass bottles are prone to breaking when they collide).
R-value: 2.2–3.0
Cooling duration: 8–14 hours (at 25°C, with ice packs)
Ideal for: Beach gatherings, backyard parties, music festivals, and offline promotions for beverage brands
Portability: Equipped with a carrying handle and shoulder strap; folds for storage
Note: Although the inner dividers reduce direct contact between bottles and cans, they can easily scratch the lining. Therefore, prioritize beer cooler bags with padded inner compartments (primarily made of thickened TPU or tear-resistant PEVA composite material).
Molson Coors beer brands launched a summer outdoor promotional campaign, using beer cooler bags as point-of-sale promotional gifts. By leveraging the bags’ bottle-cushioning compartments and large-scale brand printing, the campaign encouraged frequent reuse by end consumers at outdoor gatherings, thereby enhancing the brand’s offline visibility.
travel cooler bag
The spacious, versatile interior compartment is designed to accommodate a variety of items—such as beverages, prepared foods, and fruits—during travel.
R-value: 2.4–3.2
Cooling duration: 10–16 hours (at 25°C, with ice packs)
Ideal for: Road trips, short getaways, family outings, and general shopping trips
Portability: Wide shoulder strap and carrying handle; folds flat for space-saving storage
Note: Since this travel cooler bag is a general-purpose insulated bag, it does not provide specialized protection for specific items. If you need to store sharp food items or glass bottles, you should add additional internal cushioning to minimize impact.
REI, an outdoor retail brand, launched a self-driving travel-themed marketing campaign, selecting a travel cooler bag as a gift for online store purchases above a certain amount. Relying on its large-capacity universal compartment and sturdy carrying structure, it enables consumers to repeatedly use the product during their journeys, continuously expanding brand visibility.
breast milk cooler bag
The interior compartment is specifically designed with partitioned pockets to accommodate breast milk storage bottles and bags, with a focus on ensuring the food-contact safety of the lining and preventing odor transfer.
R-value: 2.6–3.4
Cooling duration: 8–14 hours (at 25°C, when used with dedicated ice packs)
Ideal for: Transporting breast milk to and from work, transporting breast milk while traveling, and short outings with infants
Portability: Compact and lightweight, equipped with a short handle and an adjustable thin shoulder strap for convenient carrying as a crossbody bag.
Note: When selecting a breast milk cooler bag, ensure the inner lining complies with EU Regulation 10/2011 and FDA 21 CFR food contact standards. It is not recommended to store greasy foods in the bag during regular use.
The Medela maternal and infant brand launched an educational campaign to promote the safe transport of breast milk in the workplace, offering a breast milk cooler bag as a complimentary gift with purchase. Featuring dedicated compartments for storing breast milk and a food-grade, safe lining, the bag enables working mothers to safely transport breast milk while on the go, thereby enhancing user recognition of the brand.
fish cooler bag
Primarily designed to resist corrosion from blood and seawater, with a smooth surface that makes it easy to rinse off immediately after use.
R-value: 2.8–3.6
Cooling duration: 12–18 hours (at 25°C, with ice packs)
Ideal for: Offshore and shore fishing, as well as temporary storage and transport of catch
Portability: Reinforced carrying straps; cannot be folded
Tip: Prioritize fish cooler bags with a thickened TPU lining (standard thin PEVA linings are easily punctured by fish bones, allowing blood to seep into the insulating foam). Rinse and air-dry immediately after use to prevent fishy odors from lingering and causing unpleasant smells.
The fishing gear brand Berkley organized an in-person tournament for saltwater fishing enthusiasts and selected fish cooler bags as giveaway gifts for participants. Thanks to their spacious, easy-to-clean interior and puncture-resistant fabric, these bags allowed participants to store their catch after heading out to sea, thereby strengthening brand awareness within the fishing community.
cooler bag with speakers
An upgraded version of the standard cooler that includes a sound system. It features a compartmentalized, waterproof speaker compartment that physically isolates the Bluetooth audio module from the internal chilled storage compartment, making it ideal for group gatherings.
R-value: 2.2–3.0
Cooling Duration: 8–14 hours (at 25°C, with ice packs)
Ideal for: Outdoor parties, beach gatherings, holiday retail gifts
Portability: Cannot be folded for storage due to the built-in speaker module
Note: Not suitable for harsh outdoor environments exposed to direct sunlight or rain
The JBL audio brand launched a summer music festival collaboration campaign, offering a “cooler bag with speakers” as an in-store exclusive giveaway. Featuring a compartmentalized, waterproof speaker compartment and an insulated storage area, the bag allows users to play music and store cold drinks at the same time during gatherings, thereby reinforcing the brand’s image among young consumers.
Summary of the Differences Among the Above Cooler Bags
Choosing the right cooler bag before you head out is the first step in “how to use cooler bags.” To make it easier for you to choose one or recommend one to your clients, I’ve compiled the table below comparing the R-values and cooling durations of the cooler bags mentioned above:
| Cooler Bag Type | R‑Value Range | Cold Retention Duration (25 °C ambient temperature, with ice packs) |
| food cooler bag | 2.0‑2.8 | 6‑12h |
| beer cooler bag | 2.2‑3.0 | 8‑14h |
| travel cooler bag | 2.4‑3.2 | 10‑16h |
| breast milk cooler bag | 2.6‑3.4 | 8‑14h |
| fish cooler bag | 2.8‑3.6 | 12‑18h |
| cooler bag with speakers | 2.2‑3.0 | 8‑14h |
A higher R-value indicates better thermal insulation, but that doesn’t mean it’s suitable for every situation (otherwise, there would be no need to design so many different types of cooler bags). If you want to know why, you can read my article on how cooler bags work.
Step 1: Pre-cool the cooler bag
Almost no one takes this step before using a cooler bag, but in my practical experiments (using an ambient temperature of 25 degrees as an example, with 3-cm-diameter ice cubes placed inside the bag): compared to using the bag directly at room temperature, pre-cooling the bag can extend the time it takes for the ice to melt by more than 30%. This has proven to be very useful, so now I’ll show you exactly how to do it:
Place in the refrigerator to chill
Before placing the cooler bag in the refrigerator, be sure to empty it of all contents and wipe down the interior walls (to prevent grease residue from causing odors in the refrigerator). Leave the zipper open when placing it in the refrigerator so that the cold air inside the refrigerator can directly circulate through the interior compartment and the insulation layer. There is no specific time requirement; typically, you can simply place it in the refrigerator the night before you leave, and then take it out the next day when you’re packing your food and drinks.
When purchasing cooler bags for your project, you can include the instruction “pre-chill for 12 hours” in the product’s care and usage manual. This can significantly reduce customer complaints stemming from misunderstandings—such as “insufficient cooling duration”—caused by initially loading the bag with items at room temperature.
Add ice cubes or cold water
About 30 minutes before loading food and drinks (this is just a rough estimate—no need to time it exactly), pour ice or iced water into the cooler bag, zip it closed, and let the interior and insulation cool down. When you’re ready to load the bag, simply pour out the water and ice.
Store in a cool, shaded place
If you don’t have a refrigerator, ice water, or ice cubes, place the cooler bag in a cool spot in your home (the basement is usually the coolest place) and keep it out of direct sunlight to maintain its natural temperature. Although this method is far less effective than using a refrigerator or ice cubes to keep food cold, it’s still the best option available.
Step 2: Add a cooling source
Most people take this step when using a cooler bag; the built-in cooling source can even directly determine how long the cooling effect lasts during a trip.
Chilled Foods & Beverages
In fact, if you freeze the food and drinks you’re bringing in advance, they can also serve as a source of cold. When packing, most people focus on how to use other items to extend the cooling time, while overlooking the fact that these items themselves release cold air once frozen. If the items you’re bringing aren’t suitable for freezing, place them in the refrigerator’s fresh food compartment the night before you leave.
Note: When freezing, wrap meat and vegetables in disposable plastic bags to prevent them from becoming damp and spoiling due to moisture from thawing or water from melting ice inside the cooler bag.
Ice cubes, ice packs, and even frozen water bottles
We recommend using a mix of large and small ice cubes; large ice cubes melt more slowly to extend the cooling time, while small ice cubes are used to fill in gaps. If you’re concerned about melted ice cubes getting everything wet, you can use frozen water bottles (bottled mineral water works best)—the melted water will stay inside the bottles.
When conducting standard cooling duration tests with ice in a soft-sided cooler bag (at 25°C room temperature, fully loaded, with a 1:1 ice-to-items ratio), the bag can maintain a temperature of < 10°C for 12–24 hours.
How to Make Ice Cubes at Home
If you don’t have an ice tray and there aren’t any stores nearby that sell ice, you can use any container in your room that holds water as an ice tray—such as a dinner plate, a balloon (you can even decide the size of the ice cubes), or an empty water bottle. Just fill it with water and place it directly in the freezer compartment to make ice.
Personally, I prefer using bottled mineral water—you can just freeze it as is, and the melted water is safe to drink.
What should I do if there’s a sudden power outage and the ice maker stops working?
Although this rarely happens, there’s no need to worry if it does. The core principle of refrigeration is to prevent cold from escaping and heat from entering. The simplest method is to find some newspaper (new or old) and wrap the food and drinks in it (the thicker, the better) to block the cold air from escaping as soon as they’re taken out of the fridge and prevent heat from seeping in.
What? Your client doesn’t have any newspaper on hand? You can use clothing instead—preferably a winter cotton-padded jacket—to achieve the same effect. However, before wrapping the food and drinks in clothing, it’s recommended to first wrap them in plastic wrap to prevent moisture from seeping into the fabric. After all, no one likes washing heavy winter clothes.
Tip: This emergency cooling method is only a temporary solution; it’s best to consume the food within a few hours.
Step 3: Packaging Methods to Extend Shelf Life in Refrigeration
Proper arrangement of items inside the cooler bag can also extend its cooling duration, but people usually don’t pay attention to this—they just toss in some ice, pack their food and drinks, and head out. In fact, both the placement of the ice packs and the gaps between items inside directly affect the bag’s cooling duration.
Layered Placement
Keep in mind the physical law that cold air sinks and warm air rises. In practice, placing ice cubes on top of food and drinks is more effective than simply putting them at the bottom. Of course, if you have enough ice cubes, placing them both at the top and bottom yields the best results.
Take a standard single-compartment cooler bag as an example:
Top: Place a cold source (ice cubes, ice packs—any cold source will do)
Middle: Food, drinks, and any other items you want to keep cold while transporting
Bottom: Place a cold source
Based on my experiments (conducted at a room temperature of 25°C using the same single-compartment cooler bag loaded with equal amounts of beverages and ice cubes): Using the “top-placed cooling source” or “top-and-bottom sandwich arrangement” methods improves the overall temperature uniformity inside the bag by 40% compared to the traditional “ice only at the bottom” arrangement, and extend the total ice-melting and cooling duration by 35%–50% or more.
Reduce the gap
Excessive gaps allow warm air to circulate more freely; packing items tightly helps maintain better cooling performance. If you’re carrying only a few items, the simplest method is to fill the gaps directly with ice cubes. If you don’t have enough ice, you can use any cotton-based items (such as clothes or towels—but avoid using dirty ones, as this will directly contaminate the contents) to fill the gaps and reduce internal airflow.
Note: When packing items to reduce gaps, be careful not to overfill the cooler to the point where the zipper won’t close properly. As a general rule, leave about one inch (approximately 2.5 cm) of space at the top of the lid.
Step 4: Tips for Extending the Shelf Life During Use
Once you’ve taken care of the details mentioned above, you can take the cooler bag with you and start using it right away; however, please note that there are still some details to watch out for during use that can directly cause the loss of cold air inside and affect the cooler bag’s overall cooling duration (this is the most common reason for customer complaints).
Secure the lid
Every time you open the lid to take something out, warm air from outside rushes in. In everyday use, many people forget to close the lid after taking something out, which is the main reason why cold air escapes and shortens the duration of each cooling cycle.
Avoid direct sunlight
When using a cooler bag outdoors, try to avoid direct sunlight, as this will cause the ice inside to melt faster. Once you arrive at your destination, place it in the shade; if you’re in a large open area with no natural shade, simply covering the cooler bag with a jacket or umbrella you’re carrying will also help block direct sunlight.
If you’re at the beach, the simplest method is to dig a hole in the sand and bury part of the cooler bag in it.
Retain internal chilled water
The ice water left over after the ice inside melts also helps extend the cooling time. Of course, unless you have fresh ice ready to add, leaving the ice water in the cooler bag will keep items cold longer than a cooler bag without any ice.
Step 5: How to Clean the Cooler Bag After Use
Many people simply toss their cooler bags into a corner after use. Condensation, food scraps, fish blood, and leftover beverages that remain inside the bag for extended periods can cause unpleasant odors, mold growth, and even corrode the lining, directly shortening the cooler bag’s lifespan. It’s essential to inform your project clients of this during the sales process; otherwise, you’ll receive numerous complaints of this nature down the line.
Clean the cooler bag’s exterior
Most cooler bags are made of polyester or Oxford fabric. For everyday dirt, mud, or beverage spills, simply wipe the surface with a damp cloth and a mild detergent. For stubborn stains, gently brush the fabric surface with a soft-bristled brush. Do not use a stiff wire brush to scrub vigorously, as this may scratch the fabric’s water-repellent coating.
After cleaning, place the bag in a well-ventilated, shaded area to air dry. Direct exposure to high temperatures or direct sunlight will accelerate fading and aging of the outer fabric and damage the fabric coating.
Note: Do not use bleach or highly corrosive chemical cleaners, as they will damage the fabric’s printed patterns and the waterproof coating.
Clean the cooler bag lining
Food juices, milk stains, blood, and sugary beverage stains can easily get trapped in the seams and crevices of the lining. After each use, be sure to pour out any remaining ice water from the bag first, then wipe the TPU or PEVA lining with warm water and a mild detergent. If there are fish or greasy food residues, use a soft sponge to scrub the seams repeatedly, as these areas are most prone to accumulating residue.
If there are stubborn odors, wipe the lining with a diluted baking soda solution, let it sit for a moment, and then rinse thoroughly. After cleaning, open the bag completely, turn the lining inside out, and place it in a well-ventilated area to air-dry thoroughly. Ensure the lining is completely dry before storing it; storing it while damp can easily lead to mold growth.
Tip: Do not put the entire cooler bag in the washing machine for agitation. Vigorous agitation can damage the lining’s bonding structure and stitching, causing the lining to delaminate and leak.
Common Mistakes When Using a Cooler Bag
Many bad habits when using cooler bags can directly affect the overall user experience. In my discussions with numerous cooler bag buyers, I’ve learned that when they initially closed deals with project clients, they failed to explain many important usage details. As a result, cooler bags that fully met the specifications performed poorly in actual use, ultimately leading to numerous customer complaints. In fact, the sellers didn’t do anything wrong during the sales process; it was simply the customers’ usage habits that led to such vastly different outcomes.
Add directly to food and beverages at room temperature; no pre-chilling required.
Many users simply toss room-temperature beverages and prepared foods into their insulated bags as soon as they get them, completely ignoring the pre-cooling step. However, room-temperature items—and especially hot foods—consume a significant amount of the ice packs’ cooling power. This causes the ice packs to melt quickly, resulting in a significant reduction in the bag’s cooling duration.
The zipper on the bag does not close completely when in use
Repeatedly opening the bag to retrieve items allows a large amount of hot air from outside to enter each time; furthermore, if the zipper isn’t fully closed after taking out items, cold air continues to escape through the gap, causing the bag’s cooling performance to decline significantly within a few hours. Many customers mistakenly assume this is a product defect, but in reality, it is entirely due to usage habits.
Ignoring the Risks of Mixing Product Categories
Most commonly, many customers simply place breast milk and lunch directly into a cooler bag to carry them, but this poses serious food safety risks.
Tip: When purchasing cooler bags for your project, consider designing a card with usage instructions in advance and attaching it to the cooler bag’s handle along with a card featuring your brand logo. This will help reduce the number of complaints resulting from customers’ incorrect usage habits.
FAQ
Can a cooler bag keep things cold on its own?
No. Standard soft cooler bags have no refrigeration capabilities (except for the electric models); they essentially rely on a multi-layered structure—comprising the outer shell, insulation layer, and inner lining—to provide thermal insulation and retain cold.
Can you put anything in a food-grade liner?
No. “Food-grade” simply means the material is safe for contact with food; it does not mean it is suitable for all types of food. In particular, breast milk storage bags should not be used to store foods high in oil or salt, as this can seriously compromise the safety of the infant’s food.
Is a slight odor from a new cooler bag a quality issue?
No. TPU, PEVA, and new fabrics all have a slight material odor when they leave the factory. This odor usually dissipates after one or two days of ventilation and does not affect food contact safety or performance—just like the smell of fabric you notice when you get a new piece of clothing. If the odor remains strong even after a long period of time, it can be determined to be a material quality issue.
Is it true that the more ice packs you use, the better?
No. Overfilling the ice pack can prevent it from closing properly and cause air to leak through the zipper, which will actually reduce its cooling effectiveness. Generally, when using a single pack, fill it completely but leave about one inch of space at the top.
Summary
At this point, I’m sure you’ve fully mastered how to use cooler bags. Now you can compile this information into a cooler bag user guide to send to your project clients or attach it to the handles of cooler bags already on your shelves, thereby preventing various quality issues caused by customers’ individual usage habits. If you’re unsure how to organize this information, I can send you a free copy of the cooler bag user guide I’ve already prepared—you can use it as is. Are you looking for a professional and affordable cooler bag manufacturer to help you achieve your business vision? Contact me today! At 367 Bags Factory, we offer OEM and ODM services to meet all your bag-related ideas and needs, helping you turn your business vision into reality!